External/Background Processes in Your Web Application Backend
by Frederick M. Muriithi -- Wed 03 August 2022Introduction
When building your web application, there might arise a need to run a long-running process, which would lead to the browser timing out as it waits for the response.
The typical solutions to this problem is to have an external "workers' manager" process running in conjunction with your application's server process. That means you now have to deal with deploying more than one process - your main web application, and the worker.
There is also the issue of ensuring the running external "workers' manager" process is kept synchronised with the changes to the main application's server process.
In this article, we look at a different way to handle this problem. We avoid the problem of synchronisation by avoiding a long-running "worker's manager" external process, instead focussing on what I will refer to a "on-demand" worker process management.
To demonstrate the idea(s) in this article, we shall use the Python Flask framework
Existing Solutions in Python (with Flask)
There are already systems in Python that enable you to do background/external processes, examples of which are
among others.Assumption About the Reader
I will not be teaching you how to Python, therefore, I make certain assumptions about you dear reader (and for that, I apologise), that are arguably necessary to reduce the scope of this article. The assumptions I make are:
- You know how to program in Python
- You are comfortable using Flask
- You are able to read and understand the documentation for any Python modules we will use
External Processes
To explore this idea, we shall make use of the following inbuilt modules:
We will also make use of the redis-py which you will need to install
The Idea
The idea is simple(ish):
- server receives a request
- server does pre-processing where necessary
- server creates "job" in redis with metadata
- server calls external process
- server returns a response to user redirecting to status check page which checks the status of the job periodically
- process runs to completion or failure in background updating redis "job" with status
- status page in client redirects to results page on successful run or error display page otherwise
Setting up the Application
Create the directory structure below:
		external_processes
                +-- app
		+-- etc
                +-- scripts
for *nix systems you can do this with
$ mkdir -pv external_processes/{app,etc,scripts}The app directory will contain the main application code, the etc directory will contain the default application configuration and the scripts directory will contain the scripts for the external processes we will write
The code for this article can be found at TEXT GOES HERE
Go into the root of the application
$ cd external_processes$ git init .Add a gitignore file (.gitignore):
# python virtual environment directory
/**/.venv

# application instance dir within the repo
/instance/**

# Temporary and generated files
/**/__pycache__
/**/*~
Setup the python virtual environment
$ python3 -m venv .venv
$ source .venv/bin/activate
(.venv) $
Install the dependencies
(.venv) $ pip install wheel redis flaskApplication Initialisation Code
Now we can write the code to initialise the Flask webserver. We begin with the app/__init__.py file
"""Entry point module to the application."""
import os

from flask import Flask

from .count import countbp

def create_app(instance_dir):
    "The application factory"
    app = Flask(
	__name__,
	instance_path=instance_dir,
	instance_relative_config=True)
    app.config.from_pyfile(
	os.path.join(os.getcwd(), "etc/default_config.py"))
    app.config.from_pyfile("config.py") # Override defaults

    app.register_blueprint(countbp, url_prefix="/")
    return app
For demonstration of the concepts, we will build a counting application. The application will count from a start integer to an end integer incrementing by an optional increment integer. If no increment is provided, it will default to one (1).
the file app/count.py is initialised to:
"""Main count module."""
from flask import request, jsonify, Blueprint

countbp = Blueprint("home", __name__)

@countbp.route("/count/<int:start>/<int:end>", methods=["GET"])
def count_from_to_by(start: int, end: int):
    "Count from `start' to 'end`"

    increment = int(request.args.get("increment", 1))
    conductor = start
    results = []
    while conductor <= end:
        results.append(conductor)
        conductor = conductor + increment

    return jsonify(results)
Now we need to initialise an entry point for our flask application. This will be in main.py at the root of the repository, and will have the following content:
"""Application entry point"""
import os
from pathlib import Path

from app import create_app

app = create_app(Path(os.getcwd()).joinpath("instance"))
For the sake of completeness, we add a default configuration file etc/default_config.py with the content
"""Default application configuration variables"""

SECRET_KEY="this_is_a_secret_key_that_should_be_changed"
REDIS_URI = "redis:///"
Now we can run our simplistic application
(.venv) $ env FLASK_APP=main.py FLASK_DEBUG=1 flask run
 * Serving Flask app 'main.py'
 * Debug mode: on
WARNING: This is a development server. Do not use it in a production deployment. Use a production WSGI server instead.
 * Running on http://127.0.0.1:5000
Press CTRL+C to quit
 * Restarting with stat
 * Debugger is active!
* Debugger PIN: 143-464-990The results should be a simple JSON list of numbers from 1 to 10.
Now try using a bigger range, say 1 to 1 million (/count/1/1000000). You might notice a slight delay before you get the response back. The bigger the range involved, the more time it takes to receive a response.
Now, let us add some HTML templates to the application
$ mkdir -pv app/templates
mkdir: created directory 'app/templates'
$ touch app/templates/{base,count_results}.html
$ ls app/templates/
base.html  count_results.html
base.html has something like:
<!DOCTYPE html>
<html>

  <head>
    <meta charset="utf-8">
    {%block extra_meta%}{%endblock%}

    <title>{% block title %}{% endblock %}</title>

    {%block css%}{%endblock%}
  </head>

  <body>
    <main>{%block content%}{%endblock%}</main>
    {%block js%}{%endblock%}
  </body>

</html>{%extends "base.html"%}
{%block title%}Count Results{%endblock%}
{%block content%}
<h1>Count Results</h1>
<p>The results are:
<div style="background-color: black; color: green;">
{{results}}
</div>
</p>
{%endblock%}We can change the return statement in the count_from_to_by function to
return render_template("count_results.html", results=json.dumps(results))At this point, accessing http://127.0.0.1:5000/count/1/10
gives
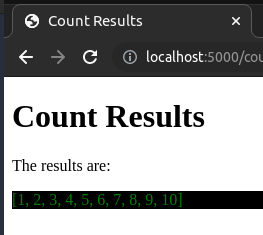
At this point, we have set up most of what we need. We will just modify
the count_from_to_by function to
def count_from_to_by(start: int, end: int):
    "Count from `start' to 'end`"

    increment = int(request.args.get("increment", 1))
    conductor = start
    end = min(end, 1000)
    results = []
    while conductor <= end:
        results.append(conductor)
        conductor = conductor + increment
        time.sleep(10)

return render_template("count_results.html", results=json.dumps(results))end value to a maximum of 1000 and
adds a delay of 10 seconds between each "count". This is mostly to avoid
causing your computer to "hang" with ridiculously large numbers, while
still allowing for demonstration of our point.If you now visit http://127.0.0.1:5000/count/1/10 you will be in for quite a wait (at least 100 seconds) before you get a result. If you attempt to get the count to 1000, you will be waiting for over two and a half hours!
The default timeout value for Nginx and Apache2 webservers is 60 seconds. Other webservers will probably be somewhere close to that value.
From this, you can infer that for any values greater than 6, you will likely run into a timeout before you get the results.
We can now write the code to run this job behind the scenes, provide the user with a progress indicator of sorts and finally present the final results when complete.
We start by extracting the actual computation from the routing function
@countbp.route("/count/<int:start>/<int:end>", methods=["GET"])
def count(start: int, end: int):
    """Count from `start' to `end`"""
    increment = int(request.args.get("increment", 1))
    conductor = start
    end = min(end, 1000)

    return render_template(
        "count_results.html",
        results=json.dumps(list(count_from_to_by(start, end, increment))))


def count_from_to_by(start: int, end: int, interval: int):
    """Count from `start` to `end` by `interval`"""
    def __delayed_compute__(value):
        time.sleep(10)
        return value

    for num in range(start, end+interval, interval):
        yield __delayed_compute__(num)
The External Script
Now we can write an external script (scripts/count.py) to do the actual computations